Hello, this is my 5 min guide on how to run MySQL 5.7 (or any previous).
After installing the fresh Kubuntu 20.04 I discovered that it comes with MySQL v8.
It’s not impossible to downgrade your MySQL 8 to 5.7 and even I made it on 2 machines. You can find how in this article
But I discovered that there is the easiest way! Dockers
You don’t need to be a Docker expert to fire the MySQL.
First of all, you need Docker installed
Please note that version 2 of Compose is already in use.
sudo apt install docker
Next to make your life easier:
// old compose v1
sudo apt install docker-compose
// new compose v2
sudo apt-get install docker-compose-plugin
Small update. Don’t use composer v1 anymore. Please check https://docs.docker.com/compose/install/ if you need to upgrade/update you composer to version 2. Instead of docker-compose you need to use docker compose ‘command’ (without dash)
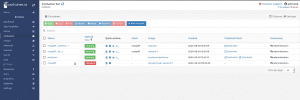
You can install Portainer.io Follow their guide. A GUI for easy dockers management.

Prepare the folders
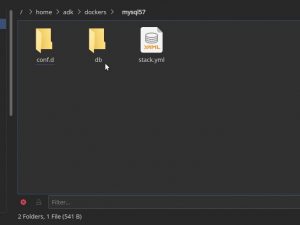
Create 2 folders if you want to use the additional extras: one for the additional MySQL config (my.cnf) and one where the data will be stored (if you want) outside the container. I found that the MySQL container comes without any text editor, so it is impossible or hard to edit your .ini files. There are some tricks with Dockerfile for adding additional packages in your container but I prefer to take out this my.cnf outside. To do this you have to “map” the internal path to the external:
- /home/*user*/dockers/mysql57/conf.d/:/etc/mysql/conf.d
and do the same for the database storage place.
Inside the /home/adk/dockers/mysql57/conf.d/ folder create empty my.cnf text file. For test purposes paste this:
[mysqld]
max_connections=200
Create one more folder (change your home folder path). The parameter -p will help you to create the full path and not folder by folder:
mkdir -p /home/*user*/dockers/mysql57/db
Next
Create your own .yml file. You better use the standard docker-compose.yml for the name. You can use a custom name (for example stack.yaml) but you have to add the name in the start command. To shorten the command you can use the standard names compose.yaml (preferred) or compose.yml, docker-compose.yaml and docker-compose.yml
Paste and edit this simple config
# Use root/example as user/password credentials
version: '3.1'

services:
  db:
    image: mysql:5.7
    command: --default-authentication-plugin=mysql_native_password
    restart: always
    ports:
      - 3306:3306
    environment:
      MYSQL_ROOT_PASSWORD: example
    expose:
      # Opens port 3306 on the container
      - 3306
    volumes:
      - /home/adk/dockers/mysql57/conf.d/:/etc/mysql/conf.d
      - /home/adk/dockers/mysql57/db:/var/lib/mysql

  adminer:
    image: adminer
    restart: always
    ports:
      - 8080:8080
Note: the indents in the .yml files are very important. So I’ll provide the code in a text file.
This code will install MySQL 5.7 container on your machine + adminer (PHPMyAdmin). Your container will work on port 3306. Change the port to a different one if you already have Mysql 8 or MariaDB installed on your machine.
End
To run and finish the job execute this command in the folder where the docker-compose.yml is placed:
sudo docker-compose -f stack.yml up //run to create the containers
and
sudo docker-compose -f stack.yml start //to freeup the console
or
sudo docker-compose -f docker-compose.yml start //if you use the standard name
sudo docker-compose -f docker-compose.yml stop

// Modern way for compose v2
sudo docker compose up
sudo docker compose stop

// Optional to free the console use -d param
sudo docker compose up -d
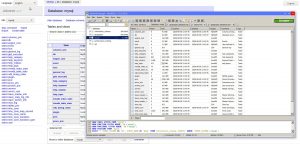
You can open the “adminer” at http://localhost:8080/ or use for example Heidi SQL (an amazing tool that you can use even in Linux via wine)
use ‘root’ as the user and ‘example’ for a password if not changed
use 0.0.0.0 for hostname/ip in HeidiSQL or find the IP

Few more tricks:
how to find the docker name (if you don’t have more running docker projects):
sudo docker ps
how to find a container ip (just copy this string in the console):
sudo docker inspect -f '{{range.NetworkSettings.Networks}}{{.IPAddress}}{{end}}' mysql57_db_1
Additionally
Check this if you are bored of using sudo all the time: https://assen.xyz/running-docker-and-docker-compose-commands-without-sudo/
Please leave a comment or help to improve it here: https://github.com/assendk/MySQL57Docker-Compose-yml
Views: 2528


Just want you to know this guide saved me at the end of 5+ hours of trying to get MySQL 5.7 to work.
Really appreciate the work you put in